
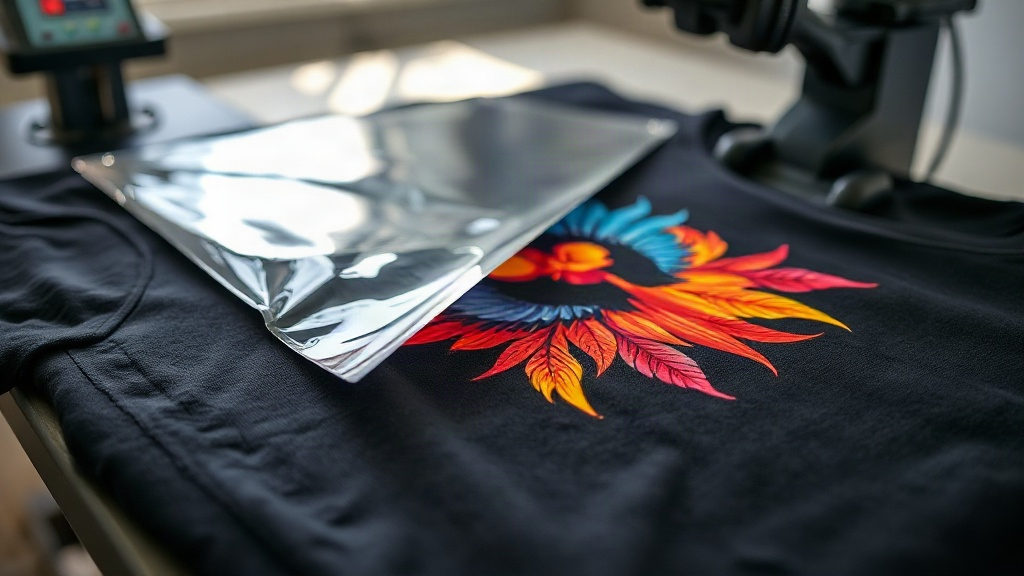
If you've been exploring custom apparel printing, you've likely encountered the term DTF. Short for Direct-to-Film, this method has rapidly gained popularity among hobbyists and professionals alike for its versatility and vibrant results. Unlike other printing techniques that require specific fabrics or extensive setup, DTF printing offers a straightforward path to transferring detailed designs onto a wide range of materials. In this guide, we'll walk through the essentials of DTF printing, from the basic process to practical tips that can help you achieve professional-quality prints at home or in your shop.
What Exactly Is DTF Printing?
DTF printing stands for Direct-to-Film. It's a digital printing method where your design is printed onto a special transfer film, coated with a powdered adhesive, and then heat-pressed onto the fabric. The magic lies in the adhesive: it bonds the ink to the fabric, creating a durable, stretchable print that can withstand repeated washing. Because the design is printed onto a film first, you're not limited to cotton or light-colored garments. DTF works on everything from polyester and blends to dark cottons, and even on items like canvas bags and denim jackets.
How Does the DTF Process Work?
The DTF workflow can be broken down into a few clear steps. Understanding each stage helps you troubleshoot issues and improve your results.
Step 1: Design Preparation
Start with a high-resolution image. DTF printers use CMYK plus white ink, so your design should be in a color profile that matches your printer's capabilities. Most RIP (Raster Image Processor) software will handle color conversion, but it's wise to soft-proof your design to avoid surprises. Remember that white ink acts as a base, so your design will be printed with a white underlayer to make colors pop on dark fabrics.
Step 2: Printing onto Film
The printer lays down your design in reverse (mirrored) onto a PET film. The film is coated with a release agent that allows the ink to transfer later. After printing, the film passes through a powdering unit. Here, a thermoplastic powder is applied to the wet ink. This powder is the adhesive that will bond the print to the fabric. Excess powder is shaken off, and the film goes through a curing oven to melt the powder into a smooth, even layer.
Step 3: Heat Press Transfer
Once the film is cured and cooled, it's ready for transfer. You place the film onto your fabric with the printed side down, then apply heat and pressure using a heat press. Typical settings are around 320°F (160°C) for 10-15 seconds with medium pressure. After pressing, you peel the film away while it's still hot (hot peel) or after it cools (cold peel), depending on the film type. The result is a soft, flexible print that's integrated into the fabric.
Why Choose DTF Over Other Printing Methods?
DTF printing has several advantages that make it a compelling choice:
- Fabric versatility: Works on cotton, polyester, blends, and even treated leather.
- No weeding required: Unlike vinyl cutting, there's no tedious weeding of small details.
- Full-color designs: Print gradients, photographs, and complex artwork with ease.
- Durability: The prints resist cracking, peeling, and fading when properly applied.
- Low setup cost: No screens or plates needed, making it ideal for short runs and one-offs.
Compared to DTG (Direct-to-Garment), DTF often produces more vibrant colors on dark shirts and requires less pretreatment. Compared to sublimation, it doesn't require polyester-coated surfaces, so you can print on 100% cotton. These factors make DTF a versatile tool in any custom apparel business.
Getting Started: Equipment and Supplies
To begin DTF printing, you'll need a few key pieces of equipment:
- DTF printer: A dedicated printer with white ink channels, such as those from Epson or Roland.
- DTF film: PET film rolls or sheets designed for DTF.
- DTF powder: Thermoplastic adhesive powder (usually TPU-based).
- Curing oven: A small conveyor oven or a heat gun for curing the powder.
- Heat press: A quality press with accurate temperature and pressure control.
- RIP software: To manage color and white ink layering.
While the initial investment can be significant, many start with a converted printer and a basic heat press. As you grow, you can upgrade to a more automated setup.
Common Challenges and How to Overcome Them
Even with the right equipment, you might run into issues. Here are some common problems and their solutions:
Ink Cracking or Peeling
This often happens if the powder isn't fully cured or if the heat press settings are off. Ensure your curing oven reaches the recommended temperature (usually around 320°F) and that the powder melts completely. Also, check that your heat press applies even pressure across the entire design.
Faded or Dull Colors
If your prints look washed out, it could be due to insufficient white ink. In DTF, white ink is the base that makes colors opaque. Increase the white ink density in your RIP settings. Also, make sure you're using the correct color profile for your printer and film.
Film Sticking to the Fabric
If the film doesn't peel cleanly, it might be because the powder wasn't cured enough or the press temperature was too low. Try increasing the pressing time or temperature slightly. Some films require a cold peel, so check the manufacturer's instructions.
Tips for Professional Results
To get the best out of your DTF printing, keep these tips in mind:
- Store film properly: Keep unused film in a cool, dry place to prevent moisture absorption.
- Preheat your fabric: A quick press before transferring removes wrinkles and moisture.
- Test your settings: Every fabric and film combination may need slight adjustments. Keep a log of what works.
- Use a quality heat press: Consistent temperature and pressure are crucial for durability.
- Clean your printer regularly: White ink can clog printheads if not used frequently. Follow maintenance schedules.
Frequently Asked Questions
Can I use DTF on 100% cotton shirts?
Yes, DTF works beautifully on 100% cotton. The adhesive powder bonds well with natural fibers, and the print remains soft and stretchable. It's one of the few methods that can handle both cotton and polyester with equal ease.
How long does a DTF print last?
With proper application and care, a DTF print can last as long as the garment itself. It withstands dozens of washes without cracking or fading. To prolong life, wash inside out in cold water and avoid harsh detergents.
Do I need a special printer for DTF?
You can convert a standard inkjet printer to use DTF inks, but it requires modifications like a white ink circulation system. Dedicated DTF printers are available and are more reliable for consistent production. Many beginners start with a converted Epson printer.
Is DTF printing cost-effective for small orders?
Absolutely. Unlike screen printing, which requires setup per color, DTF has no per-color setup. This makes it ideal for small batches and personalized items. The cost per print decreases as you scale, but even one-off designs are affordable.
What fabrics can I use with DTF?
DTF adheres to a wide range of fabrics including cotton, polyester, blends, nylon, and even leather. It's not recommended for fabrics with heavy coatings or waterproof treatments, as the adhesive may not bond properly.
With its flexibility and growing community support, DTF printing opens up a world of possibilities for custom apparel. Whether you're a small business owner or a DIY enthusiast, mastering this technique can elevate your creations. Start with a simple design, dial in your process, and watch your prints come to life.